New to bipsi/ink?
This tutorial will assume a basic understanding of ink. If you are not familiar with it, we’d highly recommend you first learn about its basics. On top of this, as binksi is a fork of bipsi, we encourage you to review the bipsi documentation to learn about how to use the editor interface and gain a general understanding of the tool. Links for both things can be found in the “How to use the editor” section on the binksi documentation.
Binksi as a concept
Binksi works in a slightly different way than bipsi. While bipsi is self-contained, a binksi game is comprised of two different dimensions: the world (bipsi) and the script (ink).
A good metaphor is that all the rooms, the player avatar, characters and items, are like a theatrical play. The characters and your avatar are puppets, the items are props and the rooms are different stage decorations. However, you can’t have a play without a script! And this is where ink comes in: Using the ink script, you tell your little puppet avatar what it can interact with, what a character says or what happens next.
What does this tutorial cover?
In this quick tutorial we will create a very simple binksi game, making emphasis on the binksi way of doing things for the below:
- Creating rooms
- Painting walls
- Creating events:
- Player Avatar
- NPCs
- Collectible Items
- Endings
It will not cover basic bipsi concepts such as how to paint tiles, how the events and fields work, how to use custom scripting for cutscenes, variables, etc. For that, please refer to the linked documentation on “How to use the editor” section on the binksi documentation.
That said, let’s get started!
Setting up a room
Binksi comes preloaded with a demo game, but in this case we want to start afresh! Open the “switch rooms” panel (in dark blue) and press +. A new room will be created.
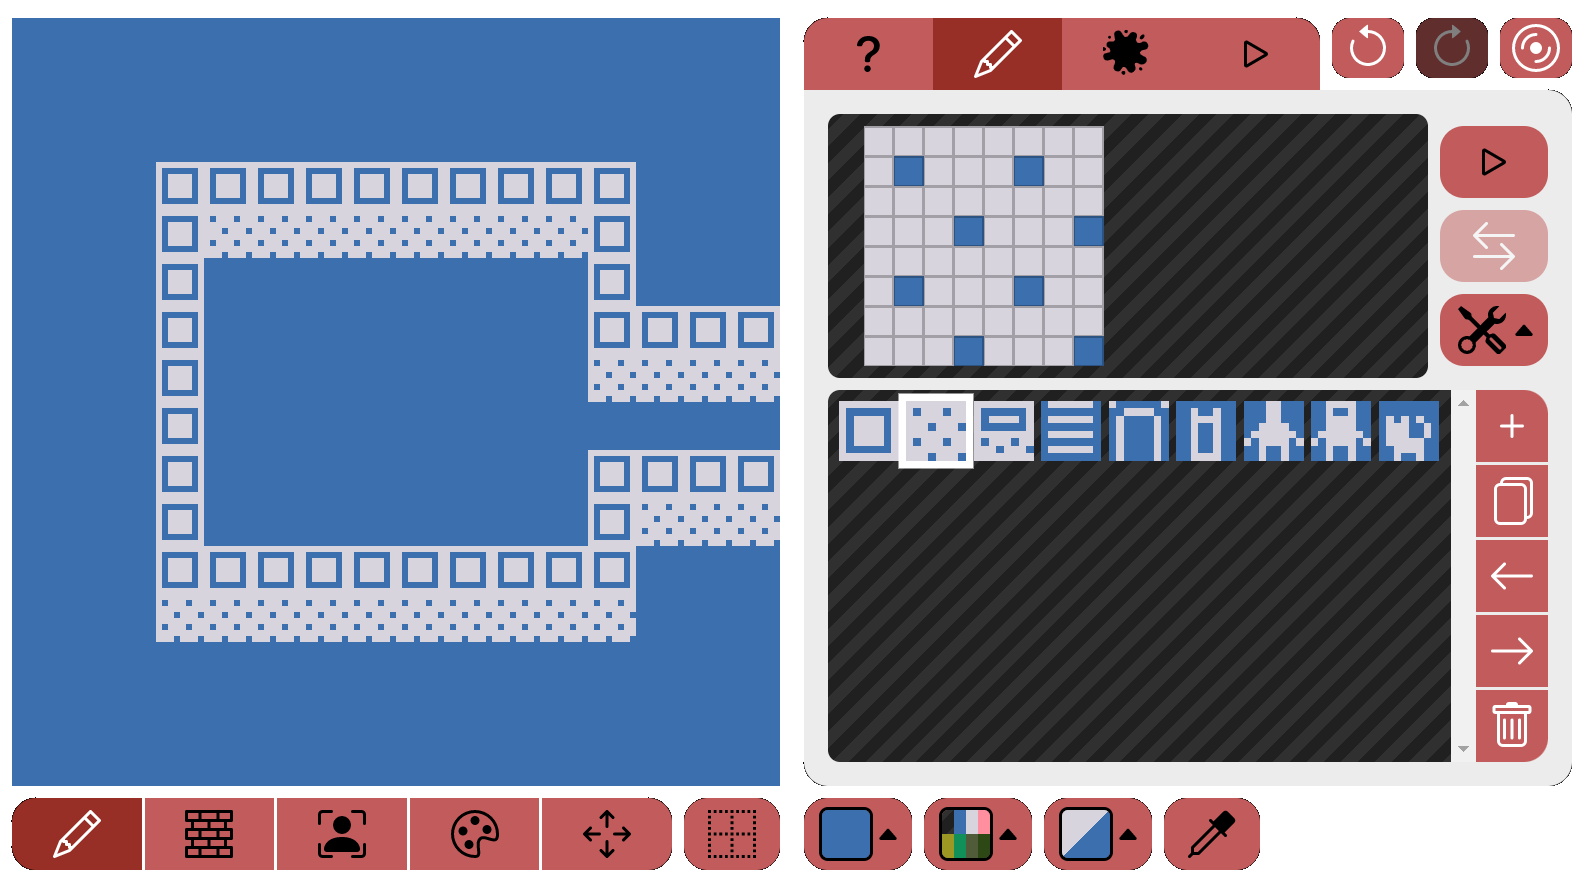
Navigate to the “draw tiles” mode (pencil on the bottom-left corner of the screen), select a tile from the panel and start drawing on the canvas on the left!
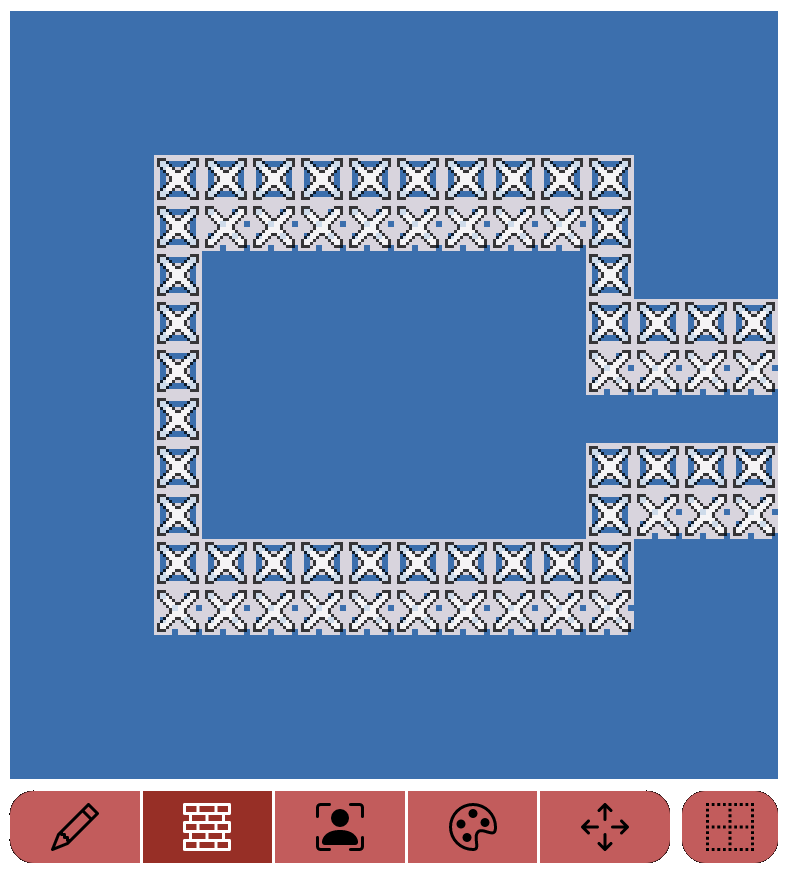
Once you are happy with the way the room looks, you need to set up walls so your avatar can’t just walk through the walls you just drew with tiles.
Go to the “draw walls” mode (brick wall icon on the bottom-left corner of the screen) and select what tiles are not walkable!
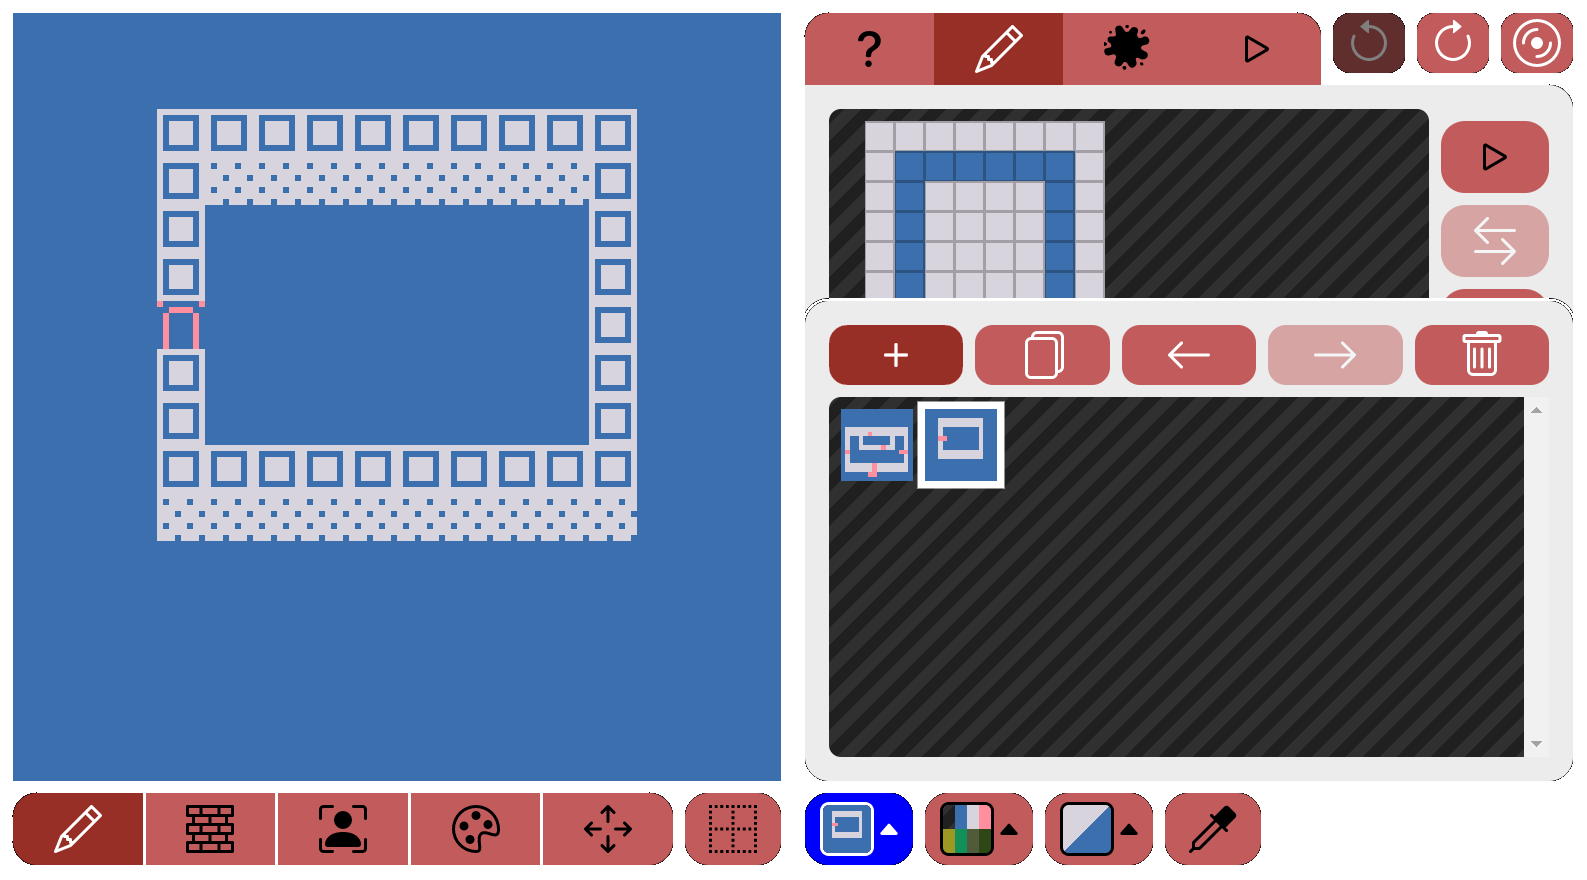
If you want to create rooms quickly, you can also duplicate them! Instead of pressing + in the “switch rooms” panel, press the copy button.
I will use this shortcut to create a mirrored version of this first room, and then tweak the tiles and walls.
Now, you need to set up the room in ink! Navigate to edit story (the tab on the right panel with the splotch of ink icon).
There’s many ways to go around this, but the simples method is to set up every room as a knot:
=== left_room
-
-> left_room

=== right_room
-
-> right_room
Placing the avatar in the new room
Feel free to erase the binksi demo rooms! Open the switch rooms panel and bin them!
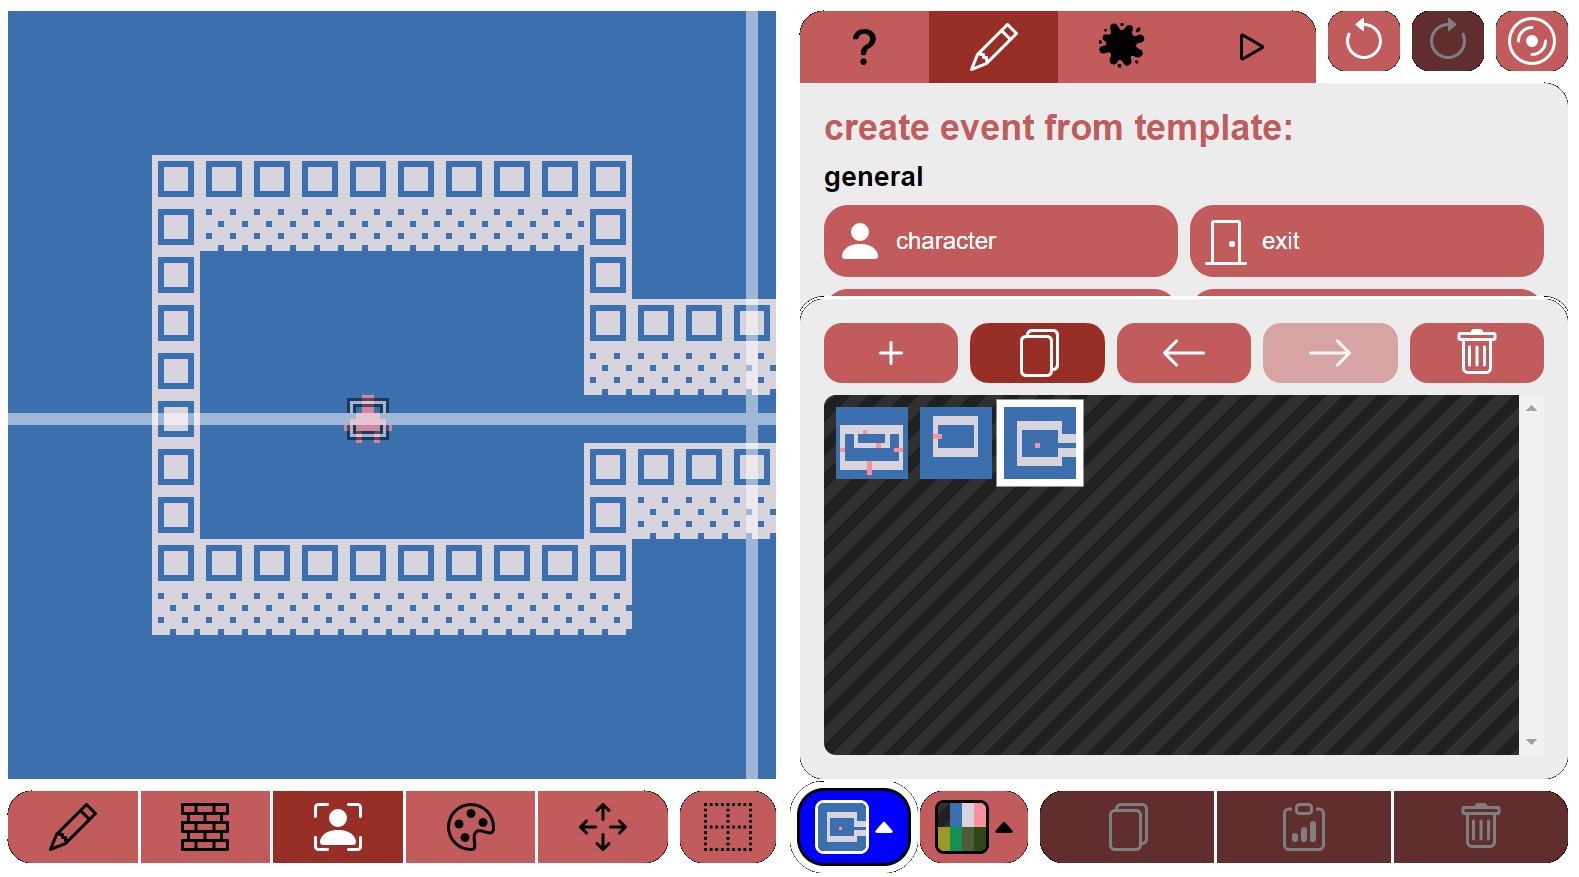
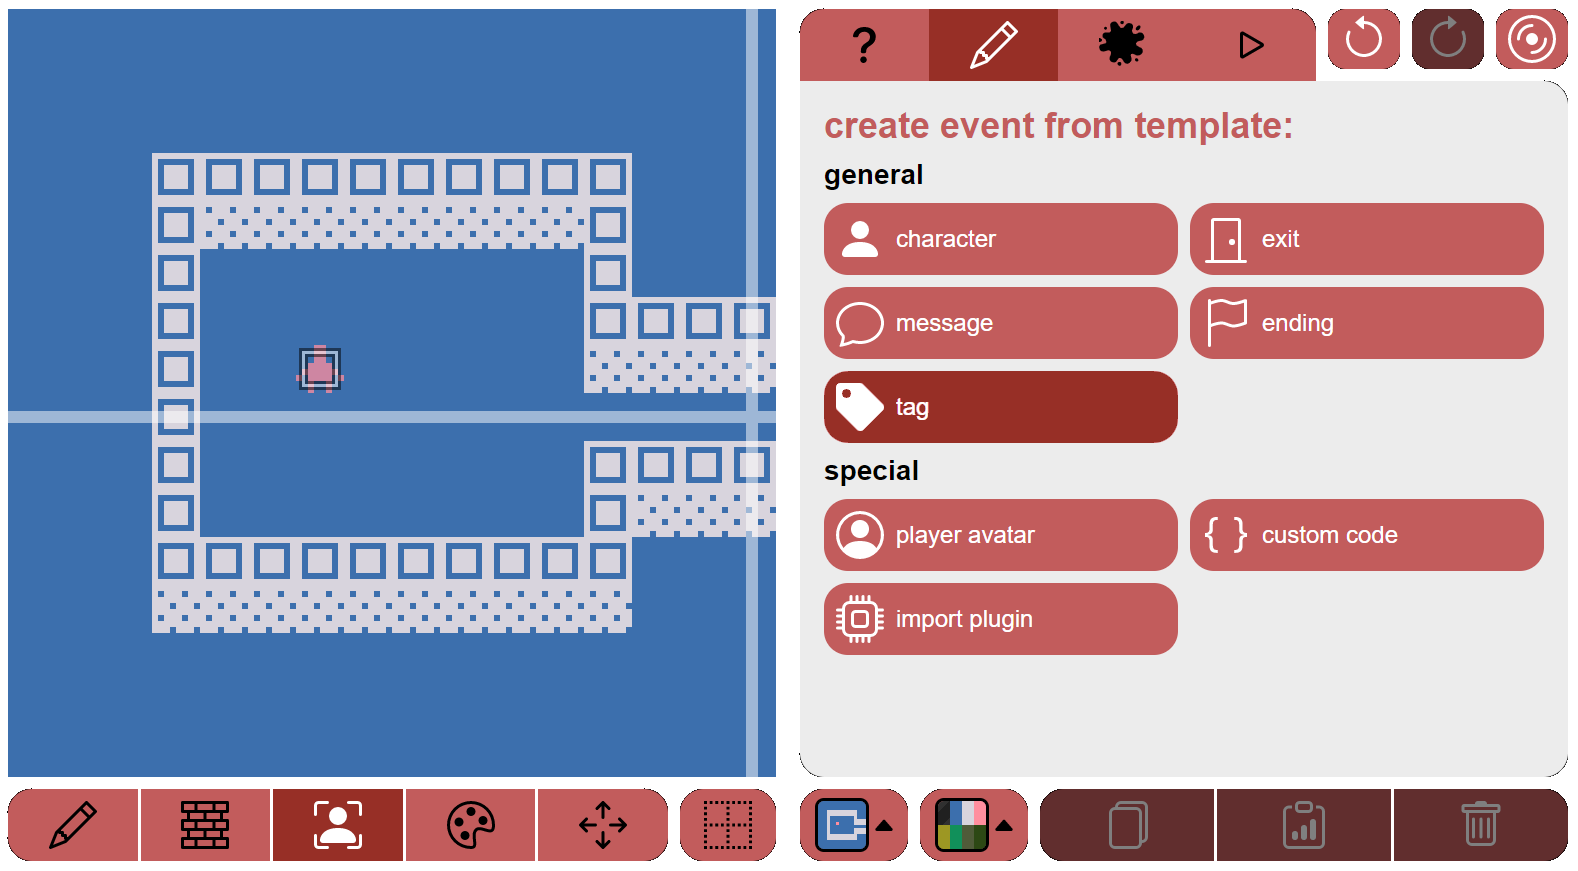
However, you have now deleted the player avatar! Do not fret, you can just create it again by going to the “edit events” mode (the bust picture icon under the left canvas). Select an empty space with the reticule and click on the player avatar button.
![]()
Place the avatar somewhere inside the room.
(Using the Player Avatar button you can respawn the avatar in a new room if you have lost it in one of your rooms and can’t find it.)
Creating an exit
Now we need an exit to go from one room to another! In bipsi you’d use an exit event. However, in binksi this works a bit different!
Go to the “edit events” mode, select the space where you want to place the event with the reticule and use the tag template.
Change the name of the tag from tagname to something a bit more descriptive, like left-room-exit.
In ink we now create a tagged choice (more info here) in each room so we can interact with the exit tags, and teleport the avatar to another room:
=== left_room

+ [tag: left-room-exit]
    SPAWN_AT(right-room-exit)
    -> right_room

-
-> left_room


=== right_room

+ [tag: right-room-exit]
    SPAWN_AT(left-room-exit)
    -> left_room
-
-> right_room
As you can see, we are not only using the binksi-exclusive SPAWN_AT() function (more information about it here), but you also need to divert the flow of the ink to the new room. If you forget to do this, the avatar will quite literally be unable to interact with the world, as it’ll have lost the flow of the script!
By the way, this story has to start somewhere, let’s add this code at the top to let the ink script know that the player starts in the left room. It will also display a title at the beginning.
tutorial ==binksi== game #TITLE

-> left_room

[...]
Creating a character
Next, let’s create a character to interact with in the second room. Pixel the Cat.
Navigate to the second room we created, and on the “edit events” mode use the Character template.
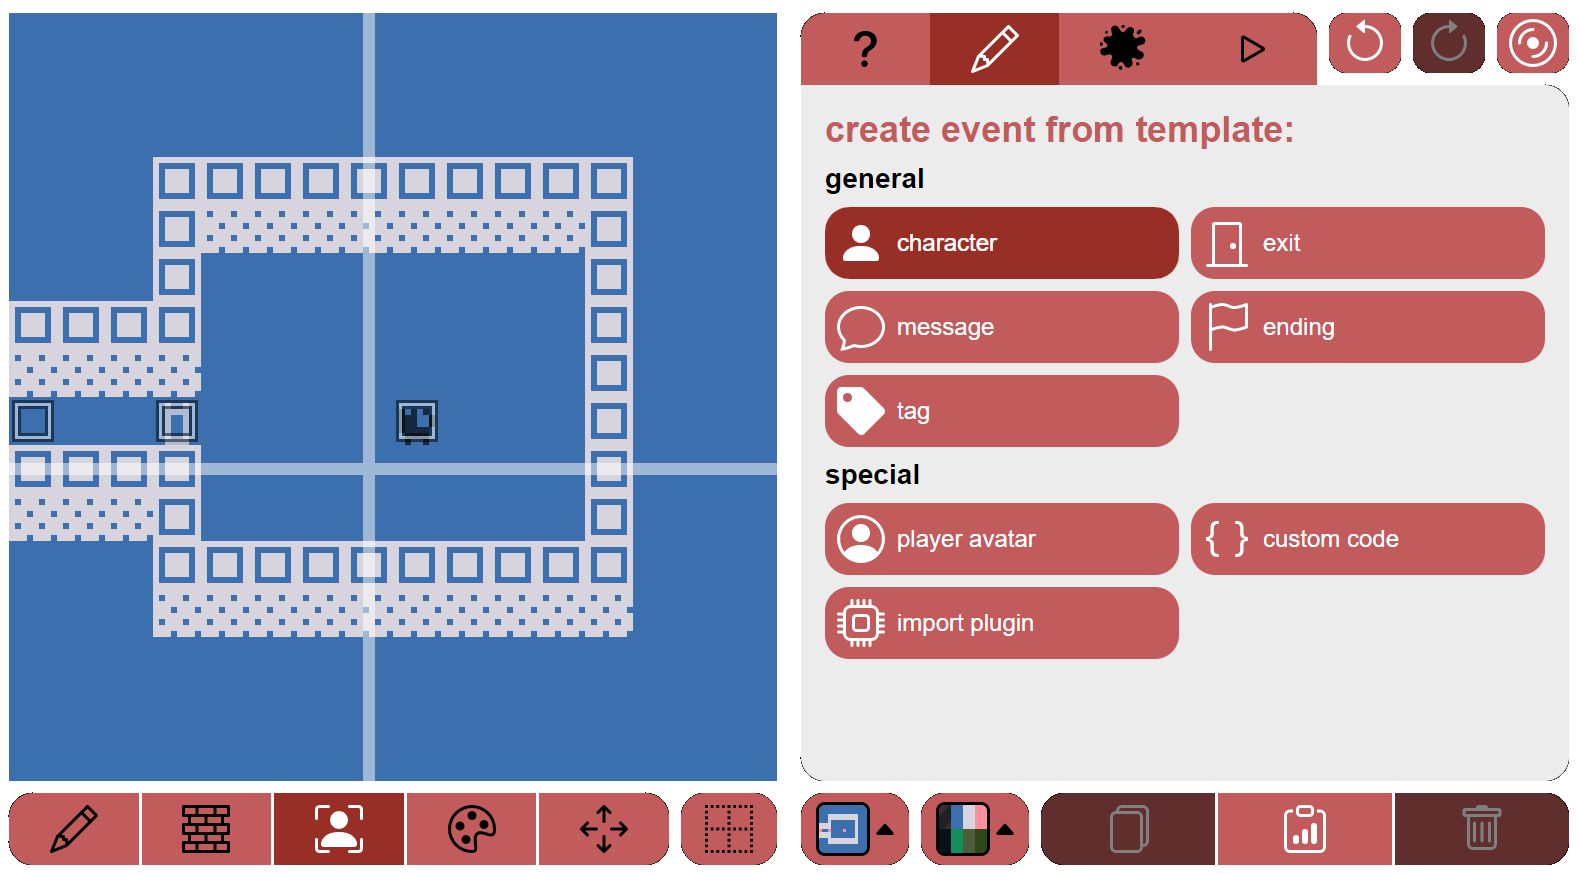
Edit the character to your liking and make sure you change the name of the character-tagname/tag field to something a bit more descriptive! In this case we’re doing pixel-the-cat even if it’s a bit long.
In the ink, we’re actually planning to have Pixel appear in the second room, but once we speak to him, he’ll teleport to the first room - and will have something different to say!
For this I’ve set up a cat-warp/tag event in the first room.
This is what the story will look like at this stage:
=== left_room

+ [tag: left-room-exit]
    SPAWN_AT(right-room-exit)
    -> right_room

+ [tag: pixel-the-cat]
  Hello! I'm here now!

-
-> left_room


=== right_room

+ [tag: right-room-exit]
    SPAWN_AT(left-room-exit)
    -> left_room

+ [tag: pixel-the-cat]
  Did you enjoy your \~\~crystal binksi\~\~?
  ++ Yes
     That's great!
  ++ No
     That's too bad...
  --
 Anyway, I want to go to the other room. See ya!
 SPAWN_AT(cat-warp, pixel-the-cat)

-
-> right_room
As we’re having Pixel warping just after you speak to him, we could technically use a normal choice * instead of a sticky + one. However, if you plan on having a character stick around, you better use a sticky choice! Otherwise the character will say the script once and then will stay there but you the avatar won’t be able to interact with it anymore!
You can of course mix it up using variables! You can have a first dialogue where you’re forced to make a choice. Then based on that first interaction, Pixel will say A or B if you interact with him again. It’d look like this:
=== right_room
[...]

* [tag: pixel-the-cat]
  Did you enjoy your \~\~crystal binksi\~\~?
  ++ Yes
     That's great!
     ~ liked_binksi = true
  ++ No
     That's too bad...
     ~ liked_binksi = false
  --

+ {liked_binksi} [tag: pixel-the-cat]
    I love crystal binksi too :)

+ {not liked_binksi} [tag: pixel-the-cat]
    I guess crystal binksi is too sweet...
However, we’re not doing this in this tutorial game.
Creating a collectible item
But what is this Crystal Binksi that Pixel keeps talking about? A collectible item!
We’re placing it in the corridor on room to right room, just before we meet Pixel. In a place it’s impossible we will talk to him before we pick this up.
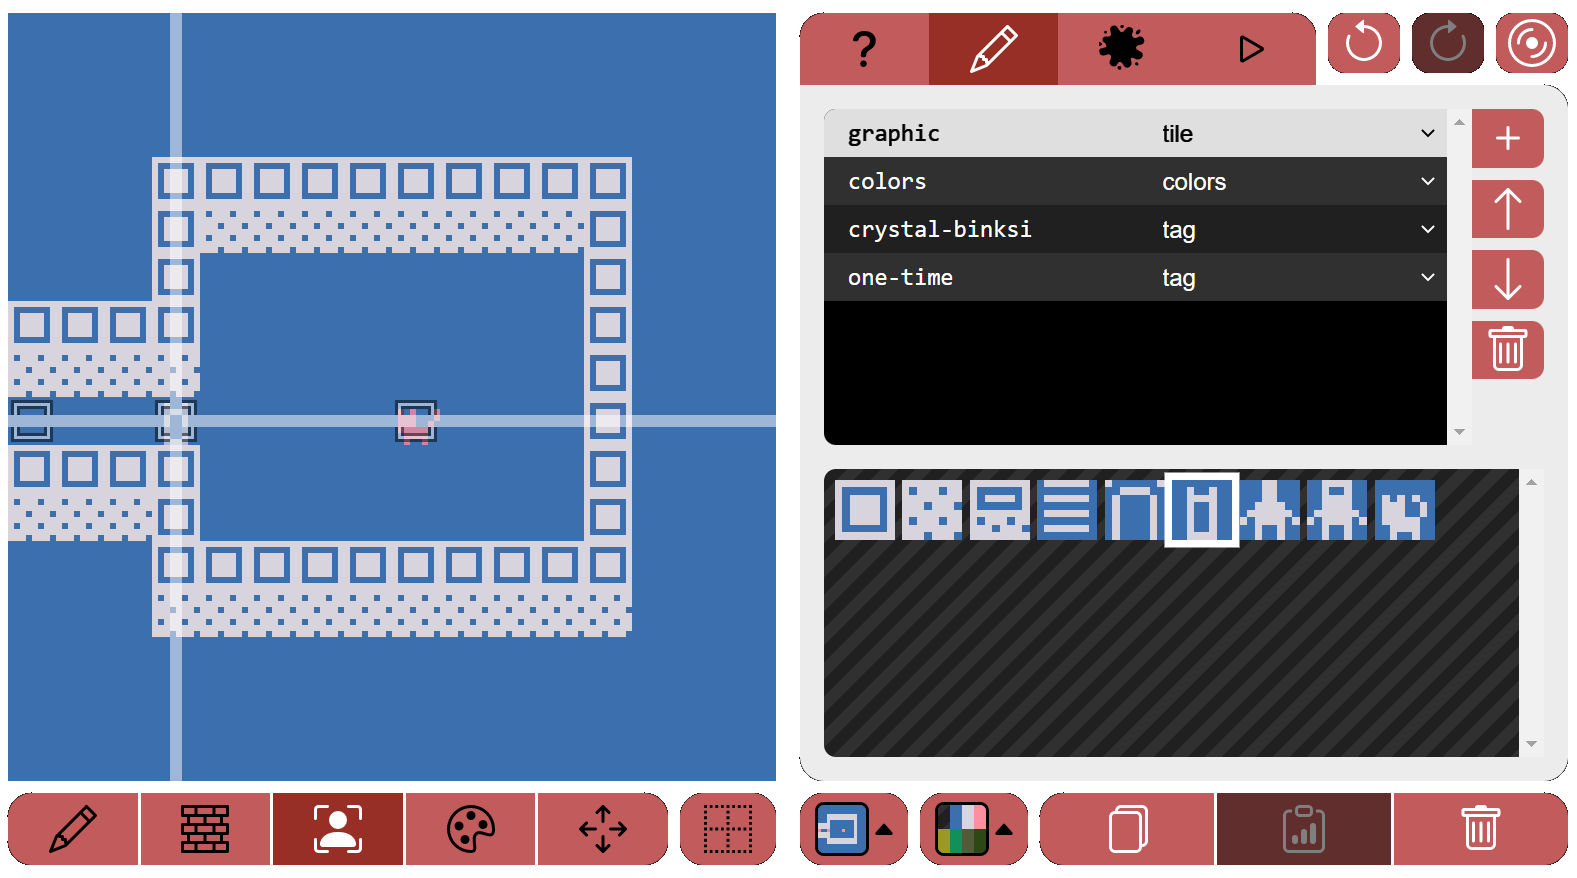
Just in the same way we created Pixel, use the character template, but add a new tag field called one-time. This will ensure that once the item is interacted with the engine will delete it and make it disappear.
As before, in this case you can use either a normal * or a sticky + choice. We will place it in the right_room knot:
=== right_room
[...]

+ [tag: crystal-binksi]
    \~\~Hmmm...\~\~ A refreshing can of crystal binksi.
If you want it so the avatar can’t walk over the item, feel free to add a solid/tag field too.
Finishing up the game
We’re almost done! Now the last thing to do is to ensure the game has an end trigger! For this we are creating an event using the Ending template. This is just as it would work in bipsi: write the wrapping sentence(s) in the bipsi text editor in the ending/dialogue field. Once the game shows that text box the game will end.
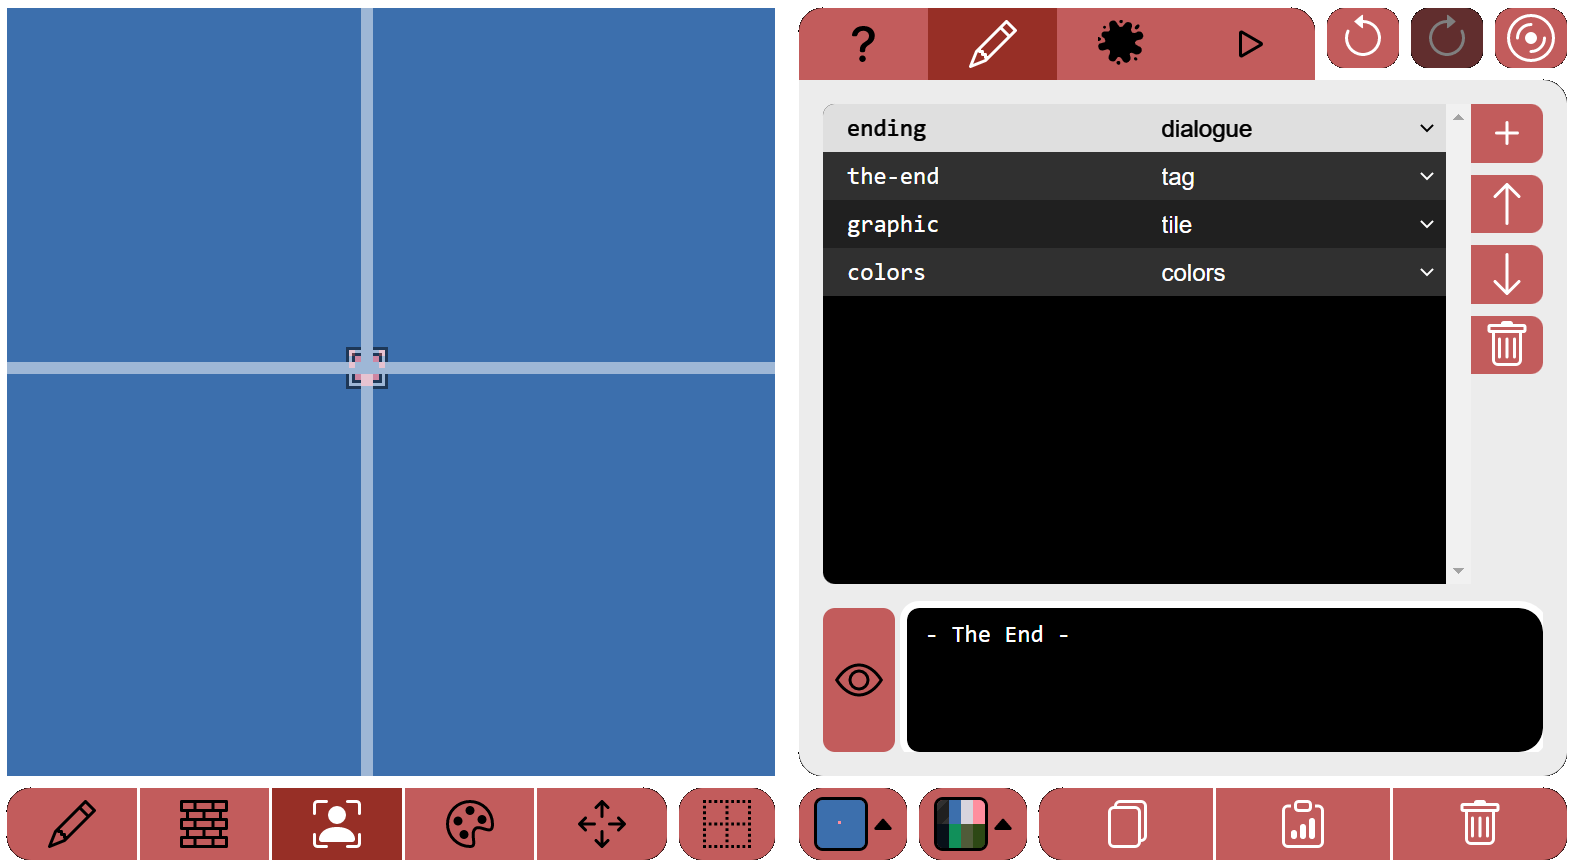
In this case we’ve also added graphics and colours to the event by adding the graphic/tile and colors/colors fields. And for a nice effect, we’ve placed the event in a “warehouse” room that is inaccesible to the player, so we can keep it hidden from view there. We will make it so once you speak to Pixel for the first time, the ending event will teleport to the space where the avatar appear once the game starts: a tag event named game-start.
And thus, this is the full script for the game:
tutorial ==binksi== game #TITLE

-> init

=== init
+ [auto: start game]
    SPAWN_AT(game-start)
    -> left_room

=== left_room

+ [tag: left-room-exit]
    SPAWN_AT(right-room-exit)
    -> right_room

+ [tag: pixel-the-cat]
  Hello! I'm here now!

-
-> left_room


=== right_room

+ [tag: right-room-exit]
    SPAWN_AT(left-room-exit)
    -> left_room

+ [tag: crystal-binksi]
    \~\~Hmmm...\~\~ A refreshing can of crystal binksi.

+ [tag: pixel-the-cat]
  Did you enjoy your \~\~crystal binksi\~\~?
  ++ Yes
     That's great!
  ++ No
     That's too bad...
  --
 Anyway, I want to go to the other room. See ya!
 SPAWN_AT(cat-warp, pixel-the-cat)
 SPAWN_AT(game-start, the-end)

-
-> right_room
Congratulations! You now have a fully working binksi game!